Sunday, October 29, 2023

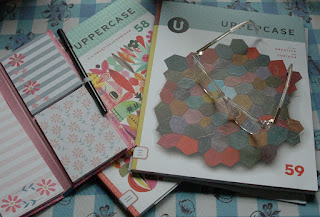
The new Uppercase 59 came!


I LOVE this magazine! It came a few weeks ago but I wanted to wait until I had a chance to read thru it  before I posted about it. I loved issue 58 but this one is even better. 

Go here to see a flip thru of the magazine:

Uppercase 59

It's so great that you can see all the pages so you 'll know what's in the magazine before you buy. Janine does a fabulous job with the magazine and the website. 

BTW, did you know she also publishes Little U, a magazine that focuses on "children's books, surface pattern design, clothing and product design for young folk, and arts and crafts inspired by and/or made for children, this publication inspires and informs professional creatives and families alike". This quote is taken from the web site. For the past month she has donated 100% of sales to UNICEF. Amazing and so generous.

It's Early! Here's the free November Embroidery..


 I thought for once I'd get one of the free embroideries up early instead of being late. BTW, I'm already starting the freebies for next year. It will be different from any of the others I've put up.

Hope you all have a fun and safe Halloween!

Here's the pattern. Follow the photo for flower placement or put them where you want.

I'm giving you some directions for the embroideries. You will need to know basic stitches and there are a LOT of youtube videos that can teach you any you don't.

1. Cut a square of your background fabric 5" x 5". This will be cut smaller later but this fits my fav 4" hoop. You can cut the fabric so it will fit in the embroidery hoop you like but make sure the birdhouse has enough room for the embroidery.


2. This step in optional but I like the stability. Now I add a square of Pelon Shape Flex interfacing. This is my favorite to use for all my embroidery designs because it's not stiff and it's easy to embroider thru. I cut the square of it slightly smaller the the entire piece. You can just add it to the center square if you prefer.

Most important!!  If you went ahead and traced the birdhouse do not use steam this can smear your tracing. I've used Pigma pens and had them smear slightly. Note: I never use steam to apply the interfacing and it sticks fine.


3.Using a permanent marker like a Pigma pen or a Pilot Frixon pen, trace the design. You can just trace the house. Use you own judgment for placement of the flowers.

Note that the Frixon pen will disappear when heat is applied. This is great if you made a mistake, just iron the fabric and start again.


4. The house can be appliqued like I did or just stitched with your favorite embroidery stitch.

Trace the house on Heat n Bond by Therm-o-web. This is a product that makes appliqueing small pieces so much easier.

TIP: Hold the iron on for just a few seconds or you will also melt the other side.

-Once it cools peel off the paper.

-Lay the fabric over the tracing and iron in place.

-Do a small blanket stitch with 1 strand of floss ( I used DMC white) around the entire house.


5.  For the base use 6 strands of floss (I used DMC 310) to make 2 rows of chain stitch.


6.The opening is filled in with straight stitches using 3 strands of floss.

-Then use 2 strands to go around the circle with stem stitch.

-Use 3 strands to make a 3 wrap french knot. (I used DMC 310 for all the stitches)


7. Draw circles where you want the flowers to be. You may want them in a few sizes. The flower centers are 3 strands of floss (I used DMC 90) to make straight stitches to fill in the circles. Add more straight stitches on top to make it padded if you want.


8. Use 6 strands of floss (I used DMC 721) to make 2 wrap French knots around the yellow center.


9. Fill in around the flowers with the greenery. I used 2 strands of floss to make fly stitch branches (I used DMC 904).


Right click the pattern to save it to your hard drive. You'll need to print a pattern for tracing.


©Billie Jo Heisler 2023

All rights reserved

 Disclaimer:

I drew this design by hand then used a software program to edit it.

Please consider the drawing copyrighted. You have my permission to print copies of the drawing in any size for your own use but not to share or sell. If you want to share the pattern please link to the blog pages.

The embroidery design is my own. I have not knowingly copied anyone else's work.

Wednesday, October 25, 2023

Found this youtube video for 10 Hand Embroidery Leaves


I was looking for some embroidery inspiration at youtube and came across this video. These are some interesting leaves. Not sure I'd ever use any of them but I'm going to try a few later.

Wednesday, October 4, 2023

Here's another new pattern at Etsy!!


I just listed another new pattern at my Etsy store! It's been included in the Oct. sale I'm having on select patterns.

I'm really catching up on writing directions for designs that have been done and waiting. This is for another crocheted design that holds a penny for luck. At my Etsy store there's patterns for a shamrock and a flower. 

Now I'm working on my new tatting patterns. Since there are 5 patterns for tatting and 5 for the items I put them on it takes a lot longer to write. So far 2 are completely done. 

Hope you'll have a look at the store for my new patterns!

Have you tried Olive & June products?


Here's a pic of my polish collection minus the 2 bottles I forgot for the pic. This polish is great and the company fantastic. They really stand behind their products. 

I was using the primer before polish and my nails were growing and looking great. I don't wear them more than 1/4 inch beyond the tip of my finger. But after about a month and a half I started noticing that my nails were getting dry again. Then they started breaking really easy. After doing some reading about the primer I found it was WAY to strong for my nails.

Now I'm having to grow them out again. It looks like I've been biting my nails they are so short. I thought about buying the nail strengthener O&J sells but I had a bottle of Pink Armor so I'm using it.

Finding the Pink Armor made me go thru my collection of nail polish. I have 4 bottles of pale lavender! I'm like, why would I have ever bought that many bottles? Especially since I tend to wear that color in the spring and only on my toes.

Next I found I have 3 bottles of pale yellow. That's a color again for my toes and only in the summer. At least there were only 2 bottles of blue and one was empty enough to be tossed out.

Then there are the 2 bottles of frost white, 2 bottles of plain white, 3 frost peach shades, 6 various pinks, 3 nudes, and one sand color. A black, gold, another white. and a dark blue have been moved to my paints in my craft room. At least they'll get used there. This list doesn't include the 8 O&J bottles.

Ok, I have to admit it now, I'm addicted to buying nail polish. I know some people have a whole lot more but my inventory has made me realize it's time to stop. Now that Walmart is selling Olive & June polish I have to stay out of the nail polish aisle.

I also use O&J's cuticle treatments and remover. I tried their buffer but found it is way to rough on my nails so I use one I got at the Dollar Tree that has a soft buff side. 

Back to why I fully support O&J. I left a 2 star review on the primer and what my experience was using it. They contacted me with a $30 gift card. I used it to try the cuticle kit which I really like. How many companies would do something like that? I bet they'll stop doing that soon since there will be those who lie just to see if they can get free stuff. Sad huh? 

BTW, my fav polish color right now is Pink Goldfish. I wore this all summer and the bottle is 2/3 empty. It is still like when I first opened it. Have you found most polish starts to thicken by the time it's half empty and by only 1/3 left it's time to toss it? I won't be wearing polish for at least a month while the very short nails grow out so it will be interesting to see if it is still usable.


Tuesday, October 3, 2023

October Free Embroidery!


Flowers in Fall colors! Notice that the pattern below has squares around the openings but I didn't embroider them on my house. When I traced the pattern on the fabric I forgot them so decided I liked them without, too. The flowers are loop bullions, but if they are too hard for you substitute clusters of French knots or a stitch you like. Also, another change from the other patterns is that I used pearl cotton instead of floss for the leaves and flowers. Use what you like.

Here's the pattern. Follow this photo for flower placement or put them where you want.

I'm giving you some directions for the embroideries. You will need to know basic stitches and there are a LOT of youtube videos that can teach you any you don't.

1. Cut a square of your background fabric 5" x 5". This will be cut smaller later but this fits my fav 4" hoop. You can cut the fabric so it will fit in the embroidery hoop you like but make sure the birdhouse has enough room for the embroidery.

2. This step in optional but I like the stability. Now I add a square of Pelon Shape Flex interfacing. This is my favorite to use for all my embroidery designs because it's not stiff and it's easy to embroider thru. I cut the square of it slightly smaller the the entire piece. You can just add it to the center square if you prefer.

Most important!!  If you went ahead and traced the birdhouse do not use steam this can smear your tracing. I've used Pigma pens and had them smear slightly. Note: I never use steam to apply the interfacing and it sticks fine.


3.Using a permanent marker like a Pigma pen or a Pilot Frixon pen, trace the design. You can just trace the house. Use you own judgment for placement of the flowers.

Note that the Frixon pen will disappear when heat is applied. This is great if you made a mistake, just iron the fabric and start again.


4. The house can be appliqued like I did or just stitched with your favorite embroidery stitch.

Trace the house on Heat n Bond by Therm-o-web. This is a product that makes appliqueing small pieces so much easier.

TIP: Hold the iron on for just a few seconds or you will also melt the other side.

-Once it cools peel off the paper.

-Lay the fabric over the tracing and iron in place.

-Do a small blanket stitch with 1 strand of floss ( I used DMC white) around the entire house.


5.  For the roof and base use 1/4 " wide black ribbon and 1 strand of floss (I used DMC 310) to make cross stitch X's over the narrow ribbon to hold it in place. Do the peak on the roof and then the straight piece.

Tip: you may want to baste the ribbon first. 


6.The opening is filled in with straight stitches using 3 strands of floss.

-Then use 2 strands to go around the circle with stem stitch.

-Use 3 strands to make a 3 wrap french knot. (I used DMC 310 for all 3 stitches)


7.To make the +, use 3 strands of black floss to make chain stitches.


8. If you decide to add the squares use 1 strand of black floss and do back stitches. 


9. Start with the greenery. I used DMC pearl cotton but you can use floss. Use 1 piece of size 8 pearl cotton (DMC 94) to make feather stitch branches. Make as many and as long as you like.

- Fill in around the greenery with lazy daisy stitches for leaves. You an do the flowers forst and then do the leaves.


10. The flowers are looped bullion stitches. I used DMC pearl cotton size 8 (DMC 90). Make them with 14 - 18 wraps. You want them in different sizes. Fill in around the stems and leaves. 


Right click the pattern to save it to your hard drive. You'll need to print a pattern for tracing.


©Billie Jo Heisler 2023


All rights reserved

 Disclaimer:

I drew this design by hand then used a software program to edit it.

Please consider the drawing copyrighted. You have my permission to print copies of the drawing in any size for your own use but not to share or sell. If you want to share the pattern please link to the blog pages.

The embroidery design is my own. I have not knowingly copied anyone else's work.